How to Share a Calendar on iPhone (2026 Guide)
Learning how to share your iPhone calendar is one of those small tech tricks that completely changes how you organize your life. It's the key to moving from a personal agenda to a truly collaborative schedule.
Think about it: no more endless back-and-forth texts trying to find a free evening for dinner. No more confusion over who's picking up the kids from practice. Instead, you get a single, shared source of truth for family events, work projects, or social plans.
This guide gets right to it, showing you exactly how to do this. We'll cover the two main ways to share your calendar, each built for a different purpose.
Private Sharing vs. Public Sharing
Your iPhone gives you a couple of options, and choosing the right one depends on who you're sharing with and what you want them to be able to do.
- Private Sharing: This is your go-to for close collaboration. You invite specific people using their Apple ID, giving them permission to either view or even add and edit events. It's perfect for a family calendar where both parents need to add appointments, or a project calendar where team members need to update deadlines.
- Public Sharing: This method creates a shareable web link. Anyone with that link can see a read-only version of your calendar—even if they don't use an iPhone. This is fantastic for things like posting a team's on-call schedule or sharing a club's event dates with the entire membership.
The real power of sharing your calendar is efficiency. It cuts down on miscommunication and keeps everyone on the same page, looking at the same up-to-date schedule.
As of 2025, Apple's native calendar sharing is incredibly robust. The only real requirement is that your calendar must be synced with iCloud, which is the default for most users anyway.
iPhone Calendar Sharing Methods at a Glance
| Feature | Private Sharing (iCloud) | Public Sharing (Link) |
|---|---|---|
| Who Can Access It? | Only specific people you invite via email or Apple ID. | Anyone who has the public link. |
| Editing Permissions | You can grant "View & Edit" or "View Only" access. | "View Only" by default. No editing is possible. |
| Best For | Family schedules, close-knit teams, and co-parenting. | Public event schedules, team vacation charts, community calendars. |
| Security | High. Access is controlled and limited to invited individuals. | Lower. The link can be shared, so don't use it for sensitive info. |
| Platform | Best for Apple-to-Apple sharing. | Works across all platforms (Android, Windows, etc.). |
Choosing the right method is all about context. Private sharing is for trust and collaboration, while public sharing is for broad, simple communication.
Whether you're trying to sync a co-parenting schedule from an app like Kidtime or just get your project team aligned, mastering these sharing features will make a huge difference in your day-to-day organization.
Privately Share Your Calendar with Specific People
When you just need to sync up with a few key people—your partner, co-parent, or a close-knit team—sharing your calendar privately is the way to go. This method gives you total control, letting you decide exactly who sees your schedule and what they can do with it. Honestly, it's the most practical way to share a calendar on an iPhone for your inner circle.
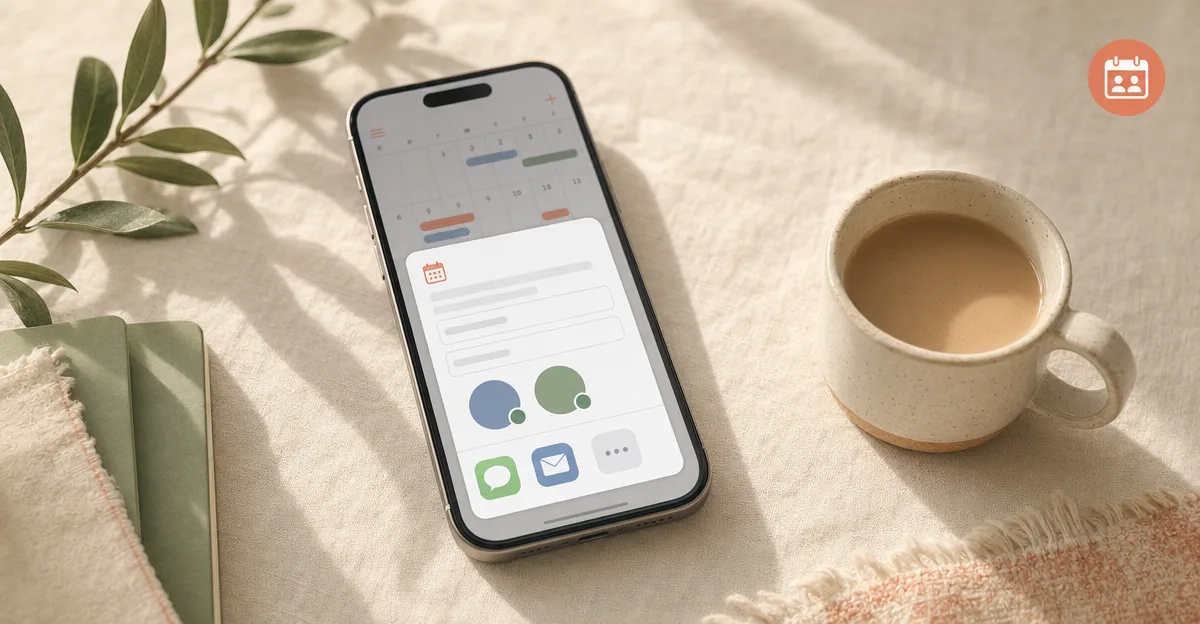
Let's dive right in. Open the Calendar app on your iPhone.
First, tap Calendars at the very bottom of the screen. You'll see a list of all your calendars. Find the one you want to share—maybe it's called "Kids' Appointments" or "Family Events"—and tap the little "i" info icon next to it. That'll take you straight to the settings for that specific calendar.
Inviting People and Managing What They Can Do
Once you're in the calendar settings, you'll see a section called Shared With. Tap Add Person. This is where you'll type in the email address of the person you're inviting.
Here's a crucial tip: you have to use the email address tied to their iCloud account. That's how Apple makes the connection. After you pop in their email, hit Add.
Now for the important part: deciding what they can do. By default, anyone you invite is set to View & Edit. This is perfect for a co-parent who needs to add soccer practice or a spouse who helps manage the family schedule. They can add, change, or delete events, making it a truly collaborative calendar.
But you don't always want everyone to have that much control. Let's say you're sharing your work schedule with an assistant who just needs to see when you're busy. Simply tap on their name in the Shared With list and toggle off the Allow Editing switch. This immediately changes their access to View Only, so they can see everything without the risk of accidentally moving an important meeting.
Expert Tip: The difference between 'View Only' and 'View & Edit' is everything. To keep your schedule from becoming a chaotic mess, always give people the minimum level of access they actually need.
Think of it this way: a "Co-Parenting" calendar probably needs View & Edit for both parents to make it work. But a "Team Snack Schedule" calendar shared with all the parents? That's a classic View Only situation to avoid a dozen people making changes. This level of control is what makes private sharing so effective for managing real-life plans.
Create a Public Link for Broader Access
What if you need to get a schedule out to a large group? Trying to invite every single person one by one, especially when you don't know if they use an iPhone or iCloud, can be a real headache. This is exactly when creating a public calendar link becomes your best friend.
Think of it as broadcasting your schedule. Toggling on the Public Calendar feature generates a special web link. Anyone who has this link can see a read-only version of your calendar—no Apple ID required, just a web browser. It's a simple, effective way to get information out there without the hassle of managing a long list of invites.
It's the perfect tool for one-way communication where you just need people to see the schedule, not edit it.
When to Use a Public Link
Let's get practical. Imagine a little league coach trying to share the game and practice schedule with all the parents. Instead of chasing down everyone's email for a direct invite, they can just create a public link, email it to the team list, and they're done. Or a community center could post the link on their website to show upcoming classes and events.
This feature really shines in a few common scenarios:
- Team Schedules: Sharing the soccer practice times or a project timeline for the whole department.
- Community Events: Posting a calendar for a local club, a church group, or volunteer organization.
- Class Syllabi: A teacher can give students a read-only view of assignment due dates and exam schedules.
A word of caution on privacy: this link is public. Anyone who gets ahold of it can see every single detail on that calendar. Never use this feature for a calendar that contains sensitive or personal information.
Ready to set it up? Just go to Calendars, tap the little info icon (i) next to the calendar you want to share, and flip the switch for Public Calendar. You can then tap Share Link to copy the URL and send it out via text, email, or post it online.
Fine-Tuning Who Can Do What on Your Shared Calendars
Sharing your calendar is one thing, but managing it effectively is where the real magic happens. Once you've sent out that invite, you'll need to know how to adjust who can see and edit your schedule. This is all about keeping your plans organized and, more importantly, secure.
Let's dive in. Open up the Calendar app and tap Calendars at the bottom of your screen. Find the calendar you want to manage and tap the little info icon (i) next to its name. This brings up a list of everyone you're currently sharing it with—think of this as your control panel.
Adjusting Someone's Editing Rights
So, what if you need to change someone's access level?
Imagine you've shared a project calendar with a team member, but their role has shifted, and now you just want them to see updates, not make them. It's an easy fix.
- Tap on their name in the shared list.
- You'll see a toggle for Allow Editing. Just switch it off.
Instantly, they go from being able to "View & Edit" to "View Only." This is a great way to prevent accidental changes while still keeping them in the loop. On the flip side, if you need a family member to start adding their own appointments to the household calendar, you can just as easily toggle that switch back on.
Your shared calendar isn't set in stone. Feel free to update permissions as people's roles change. A babysitter who's moved on probably doesn't need to see the kids' schedule anymore, and removing their access takes two seconds.
How to Completely Remove Someone's Access
Sometimes you need to revoke access entirely. To do this, just find their name in the shared list, swipe left on it, and tap Remove. They're gone.
If you're dealing with a public calendar, you can shut it down for everyone in one go. Simply toggle the Public Calendar switch off. The old sharing link will immediately stop working, cutting off access and making your schedule private again.
Sync Schedules from Other Apps and Services
Let's be real—your life doesn't happen in just one app. You've probably got a work calendar, maybe a team sports schedule, or even a dedicated co-parenting calendar app. The good news is, you don't have to keep jumping between apps to know what's next. You can pull all those external schedules right into your iPhone's native Calendar.
This is all made possible through calendar subscriptions. Think of it as creating a live, read-only feed from another calendar service directly into your Apple Calendar. It's a fantastic way to get a single, unified view of everything you've got going on.
Adding a Subscribed Calendar
First things first, you'll need the subscription link from whatever service you're using. This is usually called an "iCal" or ".ics" URL. Once you have that link copied, adding it to your iPhone is a breeze.
Just head over to Settings > Calendar > Accounts > Add Account.
From that list, tap Other, and then select Add Subscribed Calendar. All you have to do is paste the URL you grabbed earlier into the server field and hit Next. Your iPhone will then sync up, pulling all those events into your main Calendar app.
This approach is great for seeing everything in one place without giving another app full-blown access to your iCloud account. It keeps your primary calendar secure while consolidating all your different schedules.
For instance, many parents use a specialized app for managing family logistics because Apple Calendar just doesn't have those specific features. By subscribing to that external calendar's feed, they get the best of both worlds—the specialized features they need and the convenience of seeing everything in one spot on their iPhone.
Apple Calendar wasn't built for co-parenting. It can sync events between two adults, but it has no concept of "who has the kids tonight," no custody schedule templates (alternating weeks, 2-2-3, 5-2-2-5, every-other-weekend, etc.), no auto-generated parenting-time analytics, no AI Tone Scan in messages, and no unalterable communication record if you ever need one in court. If you're sharing a calendar with a co-parent specifically, Kidtime is purpose-built for it — and it can publish your custody calendar back into Apple Calendar via a subscription URL so you still see everything in one place on your iPhone.
Common Questions About Sharing iPhone Calendars
Even when the process feels straightforward, a few tricky situations can pop up when you start sharing your iPhone calendar. Let's walk through some of the most common questions, so you can get your schedules synced up without any hitches.
The biggest question is almost always about sharing with people outside the Apple world. What happens when your co-parent or family member is on an Android phone?
Can I Share My iPhone Calendar with an Android User?
Yes, you can, but there's a pretty big catch. The only way to share an Apple Calendar with an Android user is by making it public. This creates a view-only link that anyone can access.
To do this, open your Calendar app, tap Calendars at the bottom, and then tap the little 'i' info icon next to the specific calendar you want to share. From there, just toggle on Public Calendar, and the app will generate a link you can copy and send.
The person with the link can see your events in their web browser, but that's about it. They can't make changes, add events, or get it to sync seamlessly with their Google Calendar app. For true, two-way private sharing with editing permissions, everyone involved really needs to be using iCloud.
A quick but important warning: A public link is exactly what it sounds like—public. Anyone who gets their hands on that URL can see everything on that calendar. It's great for things like a kids' soccer team schedule, but you should never use it for personal appointments or sensitive information.
Why Did My Calendar Invitation Disappear?
This is a classic "it's not working" moment. You swear you sent the invitation, but the other person insists they never got it. Don't worry, it's usually one of three simple things.
First, double-check that you sent the invitation to the right email address—specifically, the one they use for their iCloud account. A work or personal email won't work if it's not tied to their Apple ID.
Next, have them take a quick peek in their junk or spam folder. Sometimes, overzealous filters can snag the invitation email.
Most often, though, the invitation is hiding in plain sight. It doesn't just arrive by email; it also pops up as a notification right inside their Calendar app. Tell them to open the app and tap Inbox in the bottom-right corner. The pending invitation should be waiting there for them to accept.
When iPhone Calendar Sharing Isn't Enough
If the calendar you're sharing is a co-parenting calendar specifically, you'll quickly hit the limits of Apple's tools — there's no custody schedule template, no parenting-time tracking, no documented messaging, and Android co-parents are stuck on a read-only public link. Kidtime is purpose-built for this: 15+ built-in custody schedule templates (alternating weeks, 2-2-3, 5-2-2-5, every-other-weekend, and more), auto-generated custody analytics, AI Tone Scan in chat, unalterable communication records, and full cross-platform sync between iPhone and Android. Free tier covers the calendar and templates; premium adds analytics, AI Tone Scan, and attorney portal access (with a 7-day trial). Download on the App Store or Google Play.
Try Kidtime free
Download the app and start coparenting with less friction today.